Client Access Color Schemes
Nexsure client access allows for the customization of the color schemes and logos that the clients will view in the client access portal.
To Customize a Logo
- On the Utility menu, click SETUP.
- In the Setup Console, click Client Access > Configuration > Color Schemes. The Logo Selection area is displayed.
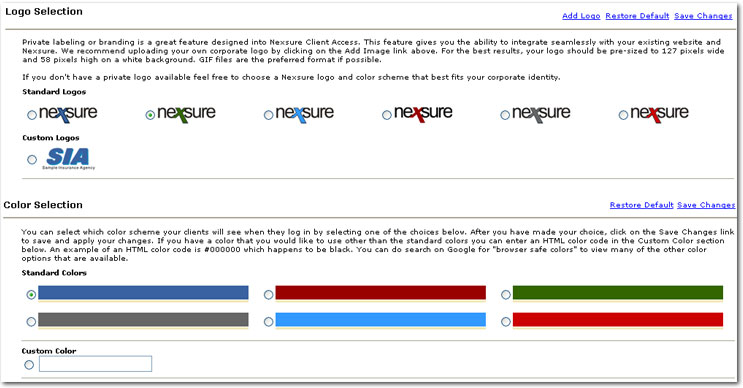
- In the Logo Selection area, choose from either Standard Logos or Custom Logos to be displayed on the client access customer portal.
- If a new logo needs to be added, click Add Logo. The Client Access Setup - Add Logo dialog box is displayed.
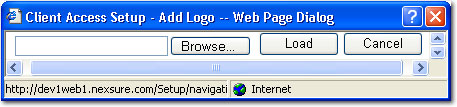
- In the Client Access Setup - Add Logo dialog box, click Browse and navigate to the new logo.
- Once the logo has been located in the Choose file dialog box, click Open. The Client Access Setup - Add Logo dialog box is again displayed.
- In the Client Access Setup - Add Logo dialog box, click Load. The logo is added to the Custom Logos area and becomes available for selection.
Or
Click Cancel to exit the Client Access Setup - Add Logo dialog box without saving selections.
- After all selections have been made, click Save Changes. The logo selections are saved and made available in the client access portal.
Or
Click Restore Default to reset all logo selections to the defaults.
Important: After clicking Restore Default, all custom logos will be removed.
To Select a Color Scheme
- On the Utility menu, click SETUP.
- In the Setup Console, click Client Access > Configuration > Color Schemes. The Color Selection area is displayed.
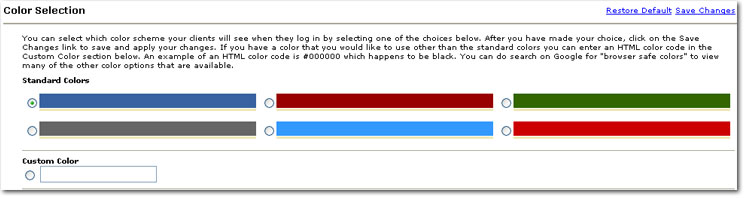
- In the Color Selection area, choose from either Standard Colors or Custom Color to be displayed on the client access customer portal.
- If a custom color needs to be added, select the Custom Color option and enter the HTML color code. For more information about HTML color codes, search for Browser Safe Colors on the Internet.
- After all selections have been made, click Save Changes. The color selections are saved and become visible in the client access portal.
Or
Click Restore Default to reset all color selections to the defaults.
Client Access General Configuration
Client Access Main Menu